Select Picture and open in Geosetter.
Once you have downloaded your camera images you will need to add the Geotag information to them, assuming your camera does not record Geotag information. If it does then you can skip this page.
Select the image, or multiple images if you took more than one in the same physical location.
Then to assign the geo location to the image(s) you must find the location in the map window. The navigation is similar to the click and drag approach common to most online mapping. So firstly type your location into the search box. The example below was taken in Derby in the United Kingdom - so type "uk derby" and click search.
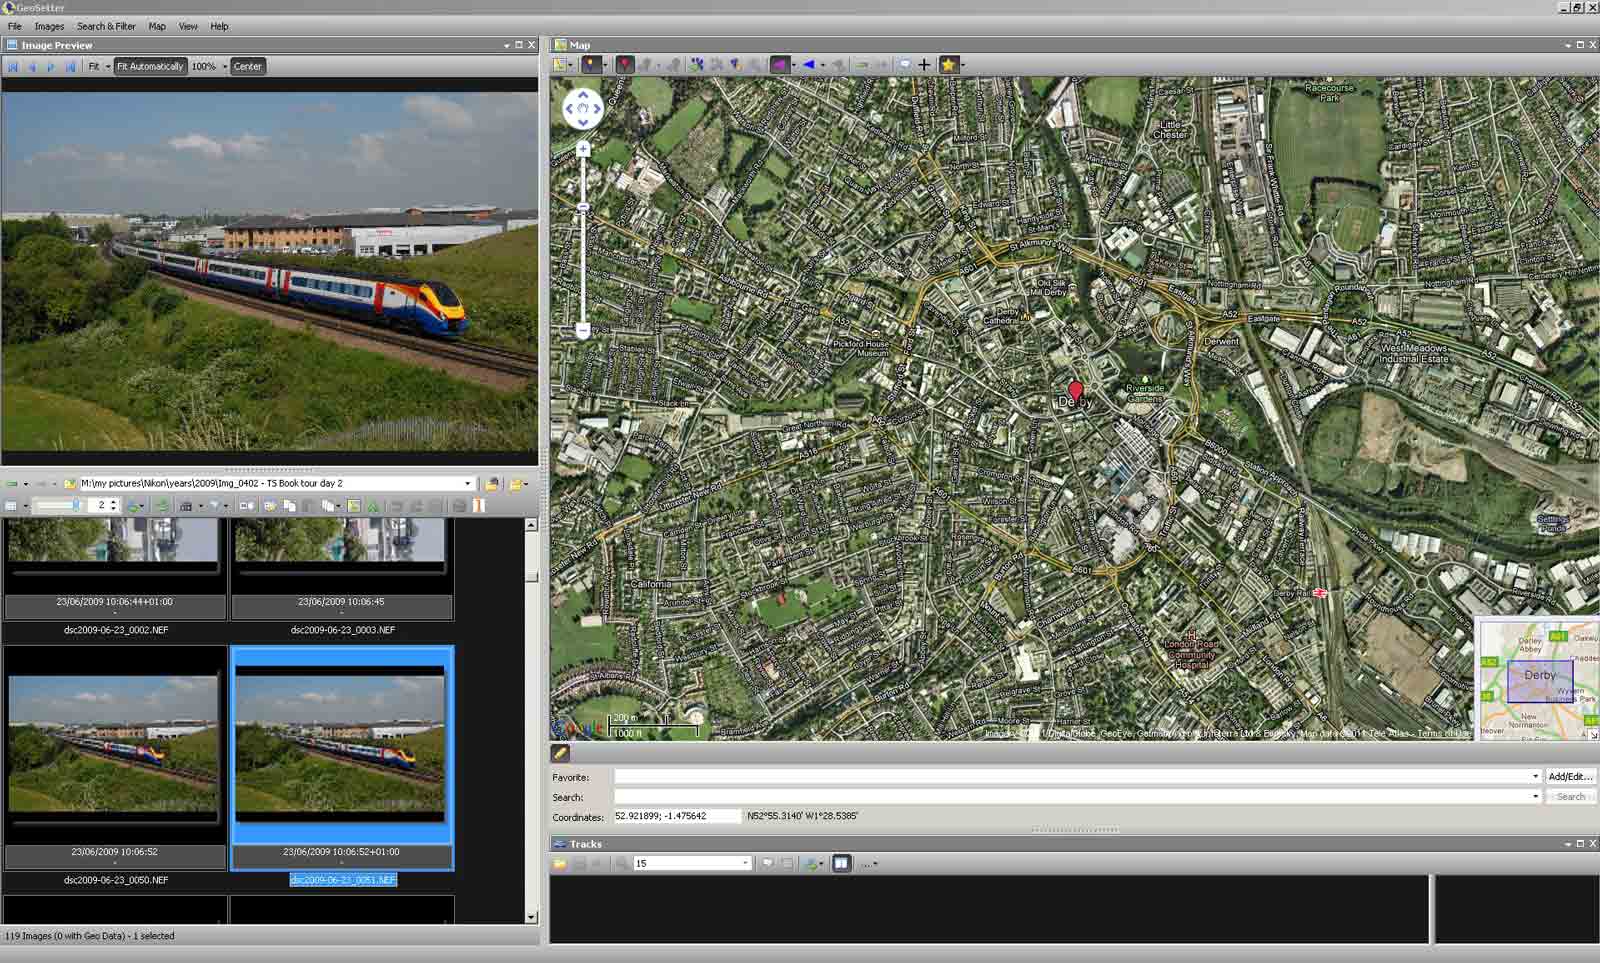
The map will then move to the right city but you will need to refine the location by hand now.

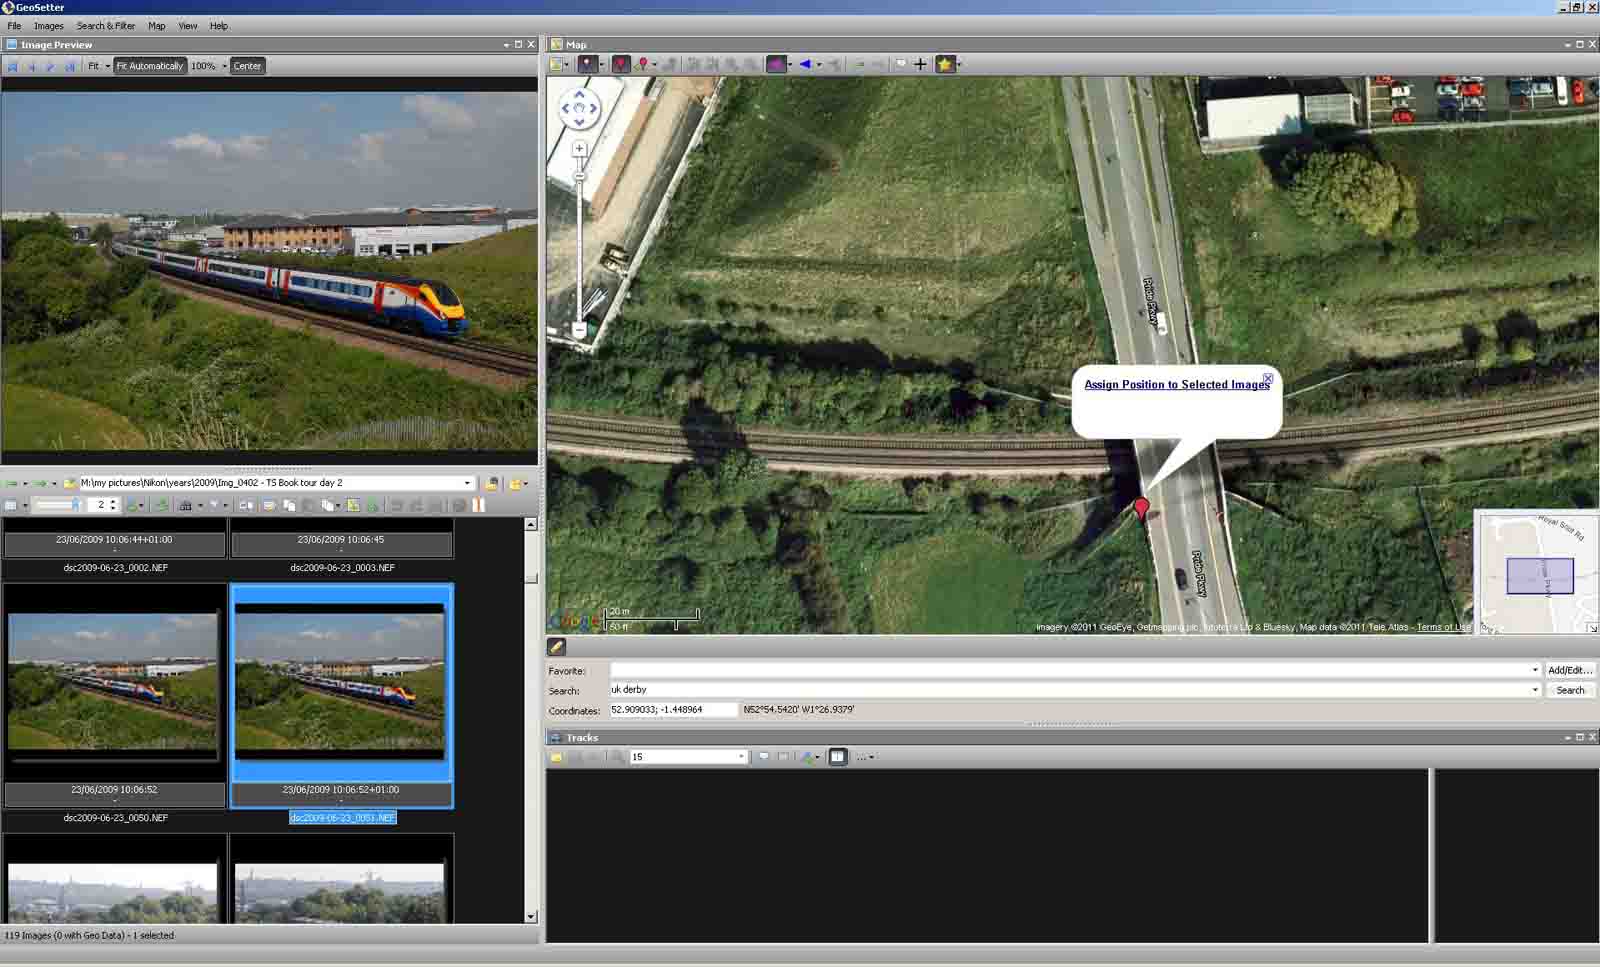
Right click at the place you were standing and select 'Assign Positions to Selected Images'. You can do this for multiple images if you wish, but this example is for an individual image.
When that is done drag the red maker off the location and a purple and yellow marker will remain.
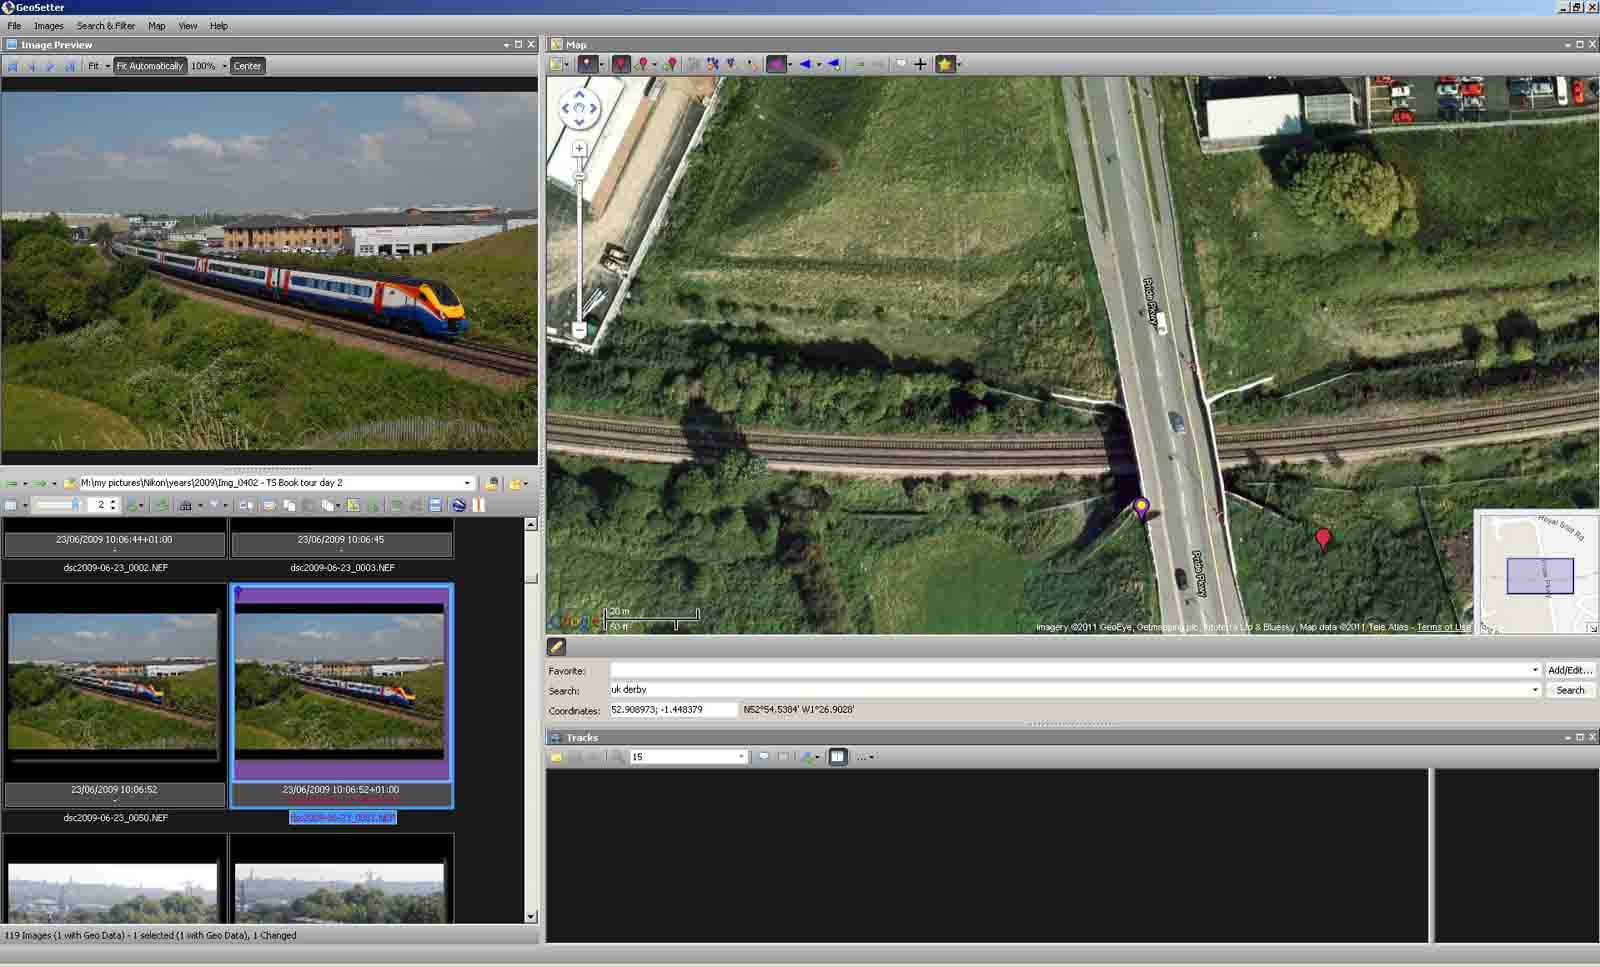
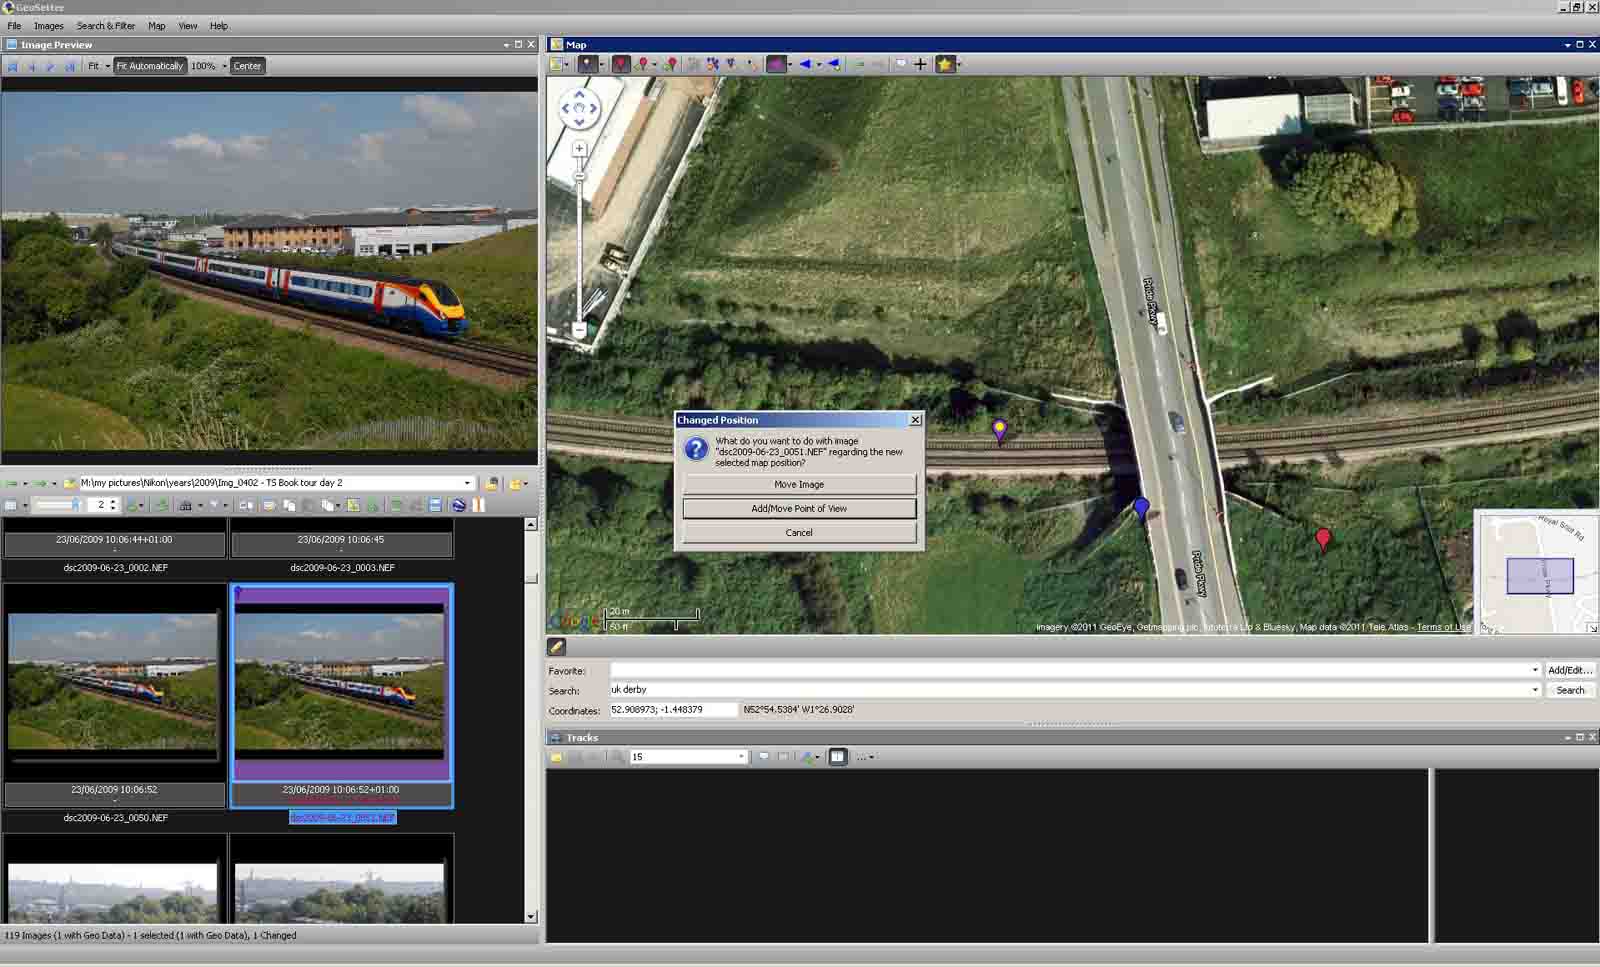
Drag this marker to the 'point of interest ' - the location of the object in the image to create and angle and a distance reference in the file. A dialog box will appear and ask if you want to move the image or add a point of view. If the location is wrong then you can move it, if not call this the point of view.
A purple triangle will now appear to indicate the approximate field of view.
Click the disc icon and save what you have done so far. Once saved the image is Geotagged.
You can choose to save your data either as an xmp sidecar file, or just update the RAW file directly.
Saving the data in a sidecar file will require you to keep two files together but it will not alter the original file. Saving the data, or in actuality updating the information already embeded, means that the information will never be separated from the original file. In both cases the metadata will follow your image through to jpeg uploaded to the website. The choice is yours.
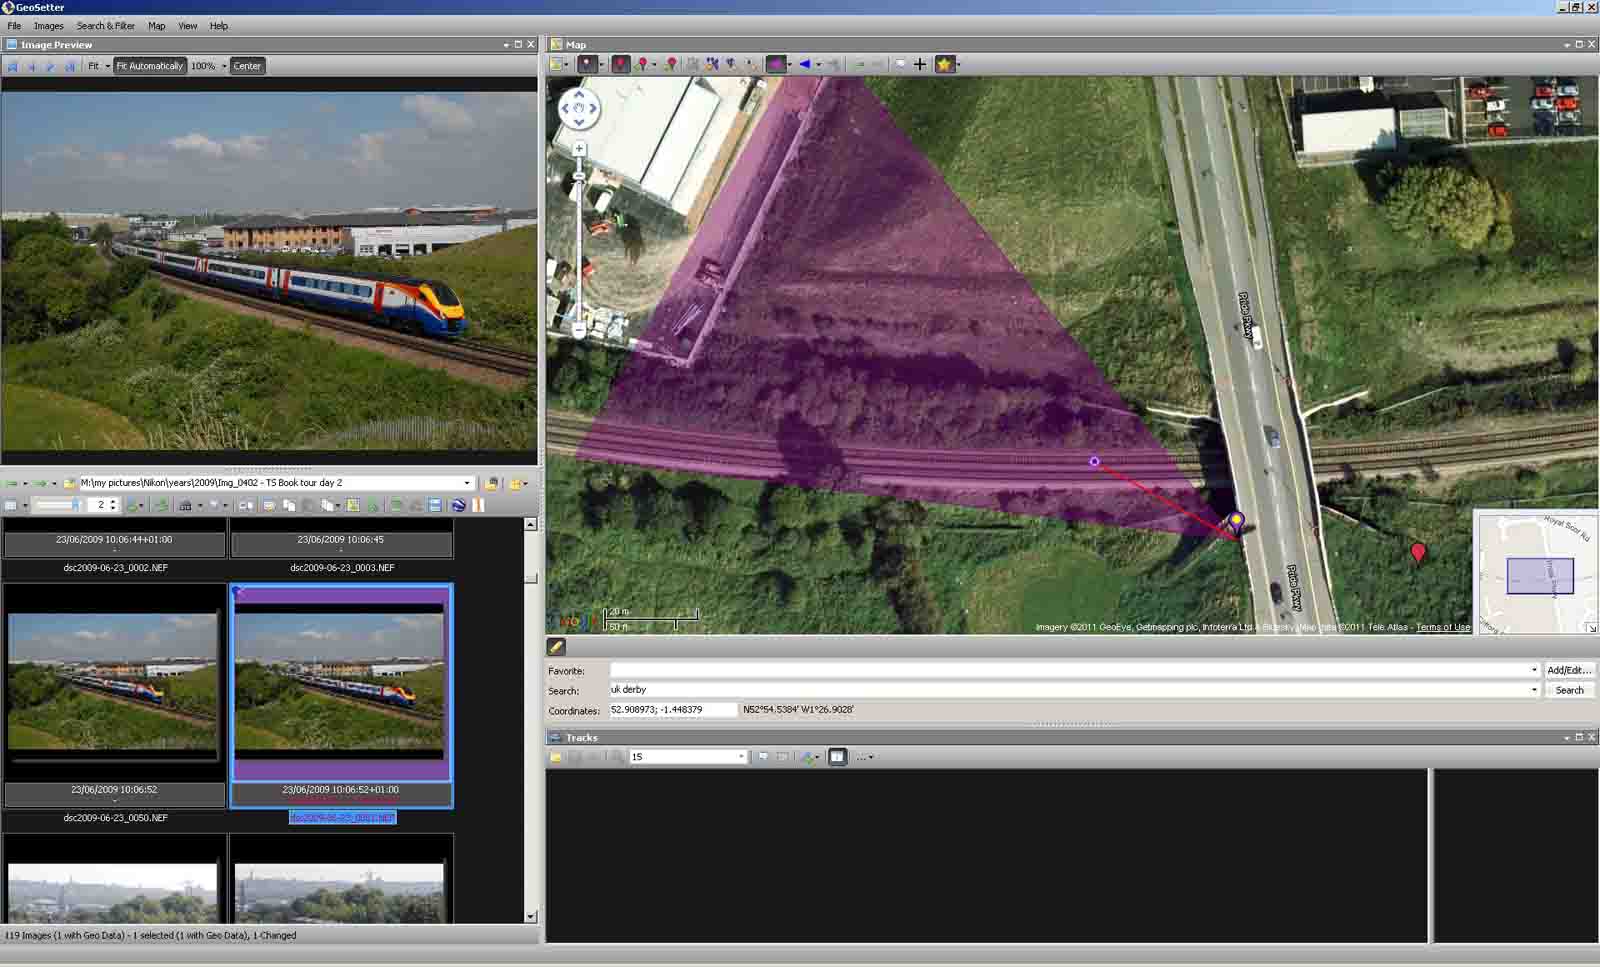
Select the image, or multiple images if you took more than one in the same physical location.
Then to assign the geo location to the image(s) you must find the location in the map window. The navigation is similar to the click and drag approach common to most online mapping. So firstly type your location into the search box. The example below was taken in Derby in the United Kingdom - so type "uk derby" and click search.
The map will then move to the right city but you will need to refine the location by hand now.
Right click at the place you were standing and select 'Assign Positions to Selected Images'. You can do this for multiple images if you wish, but this example is for an individual image.
When that is done drag the red maker off the location and a purple and yellow marker will remain.
Drag this marker to the 'point of interest ' - the location of the object in the image to create and angle and a distance reference in the file. A dialog box will appear and ask if you want to move the image or add a point of view. If the location is wrong then you can move it, if not call this the point of view.
A purple triangle will now appear to indicate the approximate field of view.
Click the disc icon and save what you have done so far. Once saved the image is Geotagged.
You can choose to save your data either as an xmp sidecar file, or just update the RAW file directly.
Saving the data in a sidecar file will require you to keep two files together but it will not alter the original file. Saving the data, or in actuality updating the information already embeded, means that the information will never be separated from the original file. In both cases the metadata will follow your image through to jpeg uploaded to the website. The choice is yours.